
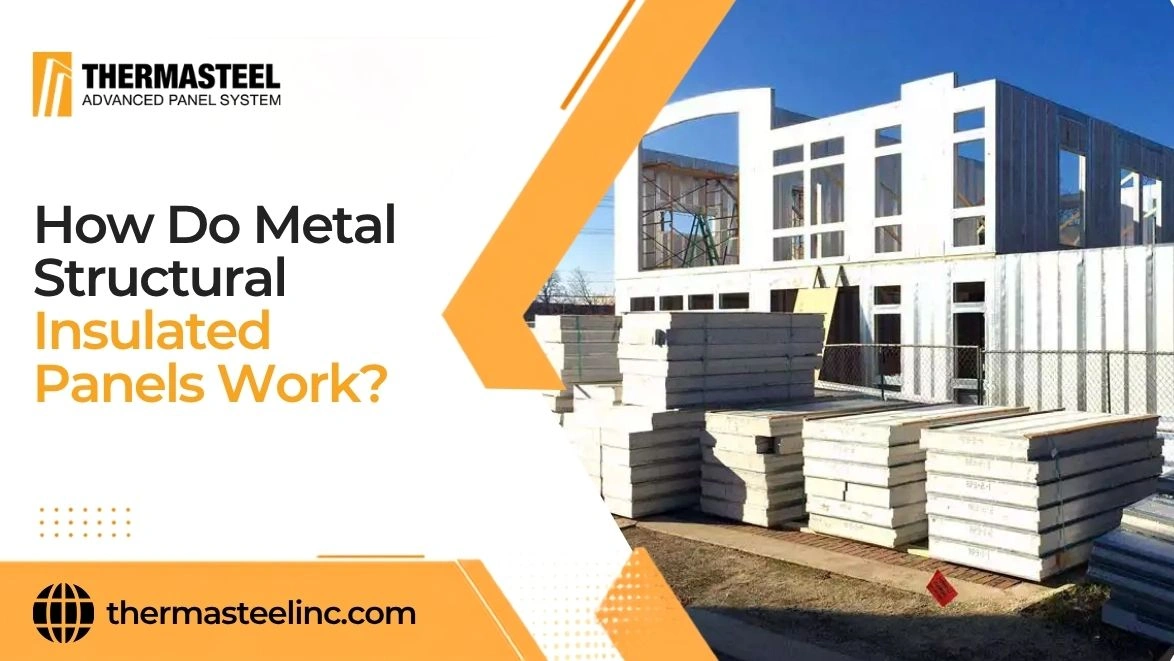
Metal structural insulated panels (SIPs) bond light gauge steel framing to a rigid EPS foam core creating one load bearing unit. The steel carries the load. The foam braces the studs, insulates the wall and separates the interior steel from the exterior steel so heat can’t pass straight through. Each panel does four jobs at once: framing, insulation, sheathing and vapor barrier.
Quick Answer
- One panel, four jobs. Each metal SIP provides structural framing, insulation, sheathing & a vapor barrier in a single factory made unit.
- The foam does more than insulate. Bonded to the steel, the rigid EPS core braces the studs against bending & buckling under load.
- A thermal break keeps heat where it belongs. Foam separates the interior & exterior steel, so heat doesn’t travel straight through the framing.
- Faster on site. Panels arrive cut to the plans, numbered & with rough openings already framed. Most of the measuring & cutting happens before the truck shows up.
- Built to last. Steel & EPS don’t rot, don’t feed termites & resist mold which removes several problems that come with organic wall materials.
Understanding How Metal SIPs Work
A conventional wall goes up in layers, usually by different crews. Framers set the studs. Someone else fills the cavities with insulation. Then come the sheathing & the house wrap. A metal SIP arrives with those layers already combined and three things happen inside every panel.
1. Carrying the Load
Inside every panel, light gauge steel studs carry the weight of the roof & upper floors. The rigid EPS core is molded around the steel frame & braces the studs along their full length. That support keeps the steel from bending, twisting, or buckling under heavy snow loads or strong wind pressure.
The studs are also turned so their strong side faces along the wall. That orientation helps each panel resist racking forces. In practice, every panel works as a shear panel.
2. Breaking the Thermal Path
Steel conducts heat well. A steel wall only performs if the steel is kept from bridging the inside & the outside. In these panels, studs sit on both faces with foam between them. So there is no continuous metal path for heat to follow.
The EPS runs across the panel as continuous insulation, interrupted only by the built-in wiring chase. The wall holds indoor temperatures steadier through cold winters & hot summers.
3. Keeping Out Air & Moisture
Panels join along tongue-and-groove edges & fasten into steel tracks at the floor & the top of the wall. Once the joints & track edges are caulked, the wall forms a tight envelope. It helps limit drafts, humid air and wind driven rain. Above grade, exterior walls need no separate weather barrier.
Why These Panels Use EPS Insulation
EPS is a rigid, closed cell foam. This matters for three reasons. It doesn’t soak up water. It holds its insulating value as temperatures cycle instead of drifting over time. And it’s stiff enough to brace steel studs, which batt or loose fill insulation can’t do.
The foam is treated for smoke and flame. The finished panel is a noncombustible assembly. It doesn’t off-gas and it gives insects nothing to eat.
Panels come in several thicknesses & steel gauges. Interior partitions are typically 3.5 inches thick, while exterior walls and roofs run 5.5 or 7.5 inches. Steel ranges from 24 gauge up to 14 gauge. The right combination depends on the building’s height, the loads it carries & the insulation your climate zone requires. It’s set during engineering for each project, not picked off a shelf.
How Steel & EPS Compare With Wood Walls
More builders and commercial contractors are looking past lumber. Steel and foam panels address several of the most common problems with standard framing.
Fewer Cold Spots
In a woodframed wall, every stud interrupts the insulation. Heat moves through those studs whenever the heating or cooling is running. Continuous EPS and a thermal break minimize those bridges, so rooms feel more even from corner to corner.
Fewer Air Leaks, Lower Energy Bills
Drafts waste heating and cooling energy all year long. When panels are properly fastened and sealed along their seams, the wall forms a tight envelope that limits air leakage. A tighter, better insulated shell can also mean a smaller HVAC system.
Resistant to Pests, Mold & Rot
Wood walls can rot, warp, or draw termites when moisture gets into the cavity. Steel and EPS give insects nothing to eat and resist rot, mold as well as mildew. That removes several problems that come with organic wall materials.
Faster Assembly, Less Waste
Stick framing means days of measuring & cutting, plus a dumpster full of offcuts. These panels arrive cut to the plans and numbered to match the shop drawings, with window and door openings already framed. Crews set them in place and fasten them. A typical panel weighs around 45 pounds, so most jobs don’t need a crane.
Comparing Wall Construction Methods
| Feature | Standard Wood Framing | OSB Wood SIPs | Steel & EPS Panels |
|---|---|---|---|
| Primary structure | Wood studs, typically 16 in. on center | OSB facings bonded to a foam core | Light-gauge steel studs bonded to EPS |
| Insulation | Fiberglass batts or rolls between studs | Rigid foam core | Rigid, closed-cell EPS core |
| Sheathing & vapor barrier | Added separately | OSB facings; vapor control added as required | Built into the panel; cladding attaches directly to the studs |
| Rot & pest risk | Higher where moisture or termites are present | Wood facings can absorb moisture | Resistant to rot, mold & insects |
| Air sealing | Depends on house wrap & workmanship | Good when seams are sealed | Tight when joints & tracks are sealed |
| Jobsite waste | Heavy lumber offcuts | Moderate cutting waste | Minimal; panels arrive pre-cut |
Step-by-Step Field Installation
If a crew can run a screw gun, it can install these panels. Studs sit 16 inches on center, just like conventional framing, so the learning curve is short. Here’s the general sequence for a wall.
- Prepare the base. Clear the slab or foundation of debris & dust. Lay sill foam, #30 felt, or a bead of seam sealer where the track will sit.
- Set the bottom track. Snap a chalk line for the track position, lay the track & bolt it to the slab or foundation per the engineer’s specifications & local code.
- Place the first panel. Start at a corner & work left to right. Drop panel 1 into the track with its leading edge on the exterior side.
- Fasten it to the track. Drive two #10 self-tapping screws through the track flanges into the panel studs on the exterior side & two more on the interior side.
- Add the next panel. Drop panel 2 in place so it sits snug in the track & in the groove of the panel beside it. Fasten it to the track the same way, then continue along the wall.
- Brace as you go. Temporarily brace the panels about every 8 feet until the structure is fully secure.
- Join the panels. Once the panels are in their final position, fasten each leading edge to the adjacent panel with six #10 selftapping screws, evenly spaced from bottom to top.
- Install the top track. After all wall panels are set, attach the top track & fasten it the same way as the bottom track.
- Seal the joints. Caulk the interior joints between panels. Then caulk the gap between the bottom track & the panel on the exterior side.
Every project comes with its own shop drawings covering openings, corners & other specific conditions. Where they differ from these general steps, follow the drawings.
Frequently Asked Questions
Doesn’t steel conduct heat? How can a steel wall be energy-efficient?
It’s a fair question. Steel does conduct heat, which is why the design matters. In these panels, the studs on the interior face are separated from the studs on the exterior face by foam. That thermal break stops heat from moving straight through the framing.
Do I need house wrap or a separate vapor barrier?
Not on above-grade exterior walls. The panel already serves as the vapor barrier. Your project’s design and local code still have the final say, so confirm with your engineer.
How do electricians and plumbers work with the panels?
Wall panels come with a 1″ x 2″ horizontal chase for wiring, so there’s no drilling through studs. For outlet boxes and plumbing, cut the foam, ideally with a hot knife and attach the box to the stud as usual.
Can I put siding, brick, or stucco on them?
Yes. Siding, brick and other cladding attach directly to the panel studs with no extra sheathing. Stucco needs a mesh installed per the stucco manufacturer’s requirements.
Are the panels fire-rated?
The panel is a non-combustible assembly. For a 1-, 2-, or 3-hour fire rating, add gypsum board or a similar fire-rated material to meet the required rating.
How heavy are the panels? Will I need a crane?
A typical panel weighs around 45 pounds. That’s light enough to carry and set by hand, so most jobs don’t need a crane.
How fast can a crew install them?
Once the track is down, an installer can typically place three to five panels an hour. New crews usually get comfortable within a few hours.
Can metal SIPs be used for more than walls?
Yes. Panels are made for exterior and interior walls, roofs, ceilings, shear walls, concrete floors and below grade foundations. Below-grade use follows specific design guidelines, so plan it with your engineer from the start.
Conclusion
Metal SIPs take a job that usually involves framers, insulators and sheathing crews and turn it into one step. The steel handles the structure. The foam handles the insulation & keeps the steel in line. The thermal break between them keeps the whole wall working as an insulated envelope instead of a row of cold spots.
None of it is complicated. That’s the point.
Install the panels correctly, with the track set, the panels fastened & the joints sealed. This is how you get a tight, durable building shell in a fraction of the time stick framing takes. Feel free to contact ThermaSteel Inc. for more information.
You must be logged in to post a comment.